
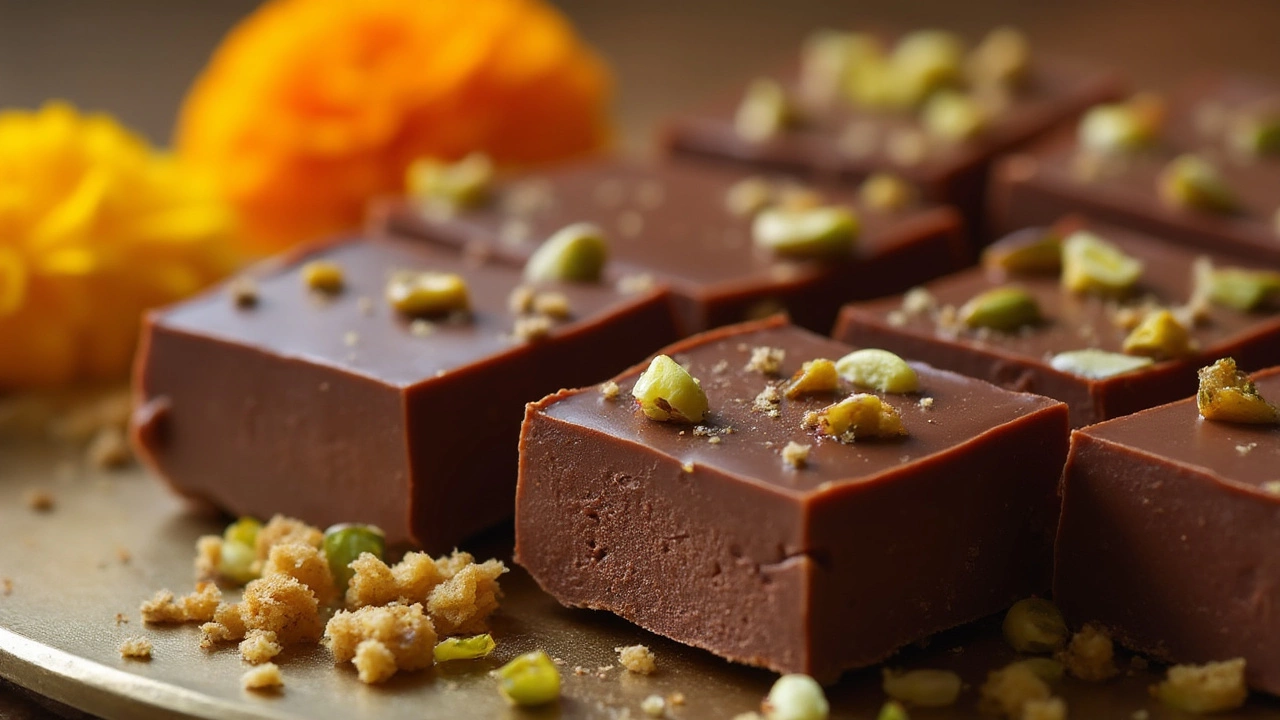
Want to know how to make a group of grown adults wince? Ask them about the last time they tried making fudge and ended up with a pan full of sugary gravel. Fudge can be the ultimate test of both your patience and your sweet tooth. Most home cooks mess up in the same spot: they get trigger-happy and start stirring way before they're supposed to. Blink, and suddenly, their creamy dreams have turned into a block of brown sand. The wild part? All this drama comes down to one thing—a matter of timing. Stir at the wrong moment, and your fudge’s fate is sealed.
The Science Behind Fudge and Sugar Crystals
Fudge isn’t just melted chocolate and sugar. It’s a mini chemistry experiment happening right on your stovetop. When you cook fudge, you’re boiling sugar and milk (or cream) at high heat, coaxing the sugar into dissolving completely. But after the mixture hits a certain temperature (typically between 112°C and 116°C, or 234°F to 241°F), it needs to cool down just right before you touch it again. That’s where things get tricky. Sugar is eager to return to its solid form, but you want it to do that as tiny, almost invisible crystals. Stir too soon, while the molten mass is still too hot, and you end up with large crystals—hello, grainy fudge.
Did you know that sugar has a sneaky way of forming crystals as soon as there’s something to cling to? Stirring early launches this process before the fudge is cool enough to slow those crystals down, leading to big, crunchy grains instead of a smooth bite. Experts at the Culinary Institute of America show that perfectly smooth fudge forms when you let the sugar syrup cool undisturbed, then beat it only after it drops below 43°C (110°F). Once it’s cool, and only then, do you stir with confident gusto—forcing the sugar to crystallize in thousands of tiny, creamy particles instead of a few gritty boulders.
Curious just how fast you can go from silk to sand? Here’s a table that sums up the stages:
| Stage | Temperature (°C) | What Happens if You Stir |
|---|---|---|
| Boiling | 112–116 | Sugar still fully dissolved—leave it alone! |
| Cooling (undisturbed) | 43–50 | If you stir now, get smooth, creamy fudge |
| Too Soon | Above 50 | Large crystals, grainy mess |
Everyone wants that perfect, melt-in-your-mouth result, but not everyone understands that patience is part of the recipe as much as sugar or chocolate. Old cookbooks make a big deal of “not stirring too soon,” and now we know there’s real chemistry behind it.
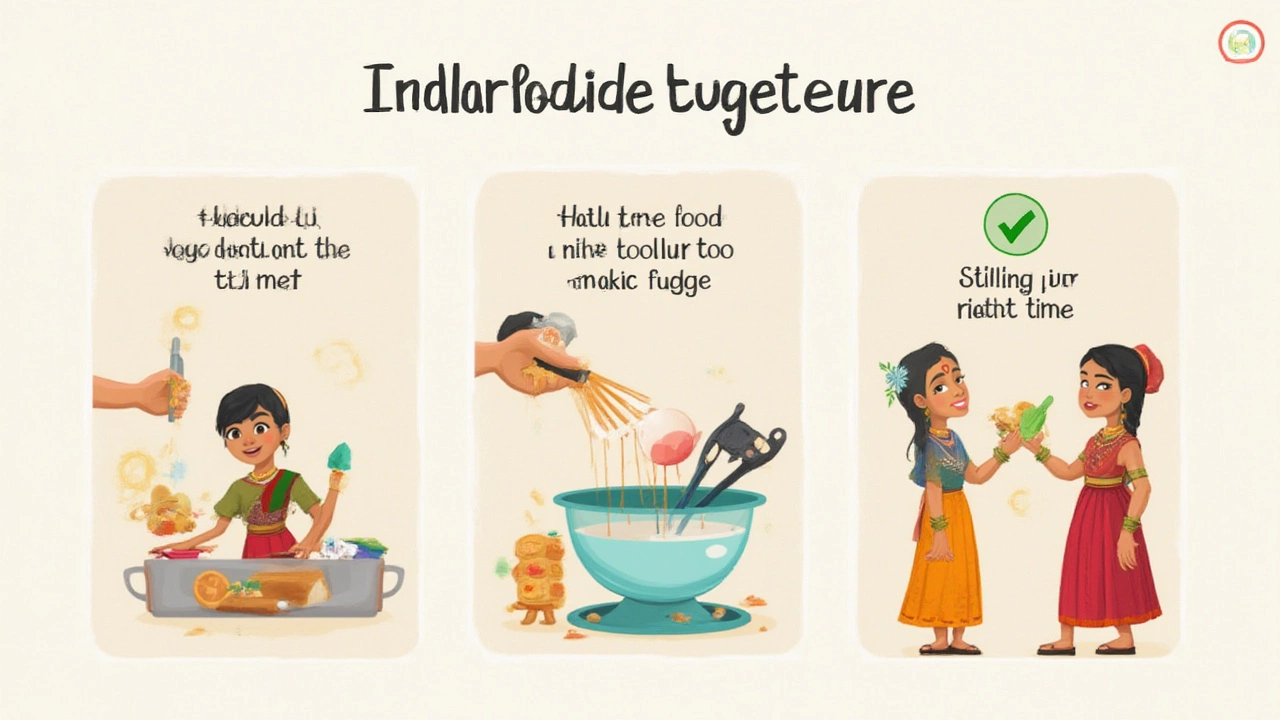
What Actually Happens When You Stir Fudge Too Early?
Let’s break it down in plain terms. When you stir fudge before it’s cooled enough, you don’t just ruin its texture—you ruin its future. Here’s the full story: The minute your spoon enters the hot syrup, you’re giving the dissolved sugar the green light to form crystals. If it’s still too hot, those crystals multiply rapidly, grabbing any excuse to bond together and grow as big as they can. Once the process starts, you can’t put the genie back in the bottle. Every subsequent stroke of your wooden spoon increases the problem—big crystals bump into each other, trapping air and making that dreaded, crumbly texture you’d expect from fudge you left out on the bench overnight.
The funny thing is that sugar is almost like a crowd at a gig—they want to cluster up the moment they sense a leader. Stirring acts as that leader, and if your fudge is still piping hot, you’re practically announcing, “This way to Grainy Town!” The only way out at that point is to try salvaging the batch for some other purpose (ice cream topping, maybe?), but don’t expect glossy squares. Even professional bakers have been humbled by this pitfall—there’s a reason fudge has its own dedicated window in every old-school lolly shop.
People tend to assume all fudge disasters are their fault. But this is more about timing than talent. Science is doing its thing whether you believe it or not. In my kitchen, I can’t even tell you how many promising batches have ended up being emergency toppings over the years. Chalk it up to impatience—a trait most of us share, especially when sugar is involved.
Timing also matters for another reason. At higher temperatures, not only does sugar crystallize rapidly when agitated, but the steam escaping from the mixture can grab onto those sugar particles, making clumps and “crust” layer that sticks to the sides of your saucepan. Once that starts, your fudge develops dry edges and a dense, unpleasant bite instead of something smooth. Australian fudge makers learned ages ago to wait and watch. There’s a strong tradition here in Melbourne's smaller cafes to slow down and respect the process, often letting the fudge cool right in the pan before even thinking about stirring it. This might be “old school,” but there's a reason their fudge wins awards.
Why Patient Cooling Makes Creamy Fudge Possible
If you leave your freshly boiled fudge syrup alone and let it cool until it’s just warm—not hot—before you begin stirring, you’re setting yourself up for a dream result. This is when micro-crystals can form, resulting in that classic smooth, creamy texture. The magic zone is when the mixture drops below about 43°C (110°F), cool enough to slow crystallization but warm enough to keep things blendable as you stir.
Ever notice how the best fudge just melts on your tongue, leaving zero grit behind? That’s patient cooling in action. Melbourne’s favourite fudge shops—and trust me, we do love our fudge—always let their pans cool on the bench or sometimes even in a water bath. If you try to rush this step, especially on a humid Victorian afternoon, you’ll regret it. Humidity plays another role here too—when there’s a lot of moisture in the air, your cooling fudge can start to set unevenly, sometimes grabbing too much water and sometimes too little. This is why city fudge shops often tweak their recipes in the wetter months, or fiddle with pan sizes and cooling times.
So, how can you nail the wait? Here are some tips straight from small-batch confectioners:
- Use a sugar thermometer—don’t guess the temperature by eye.
- Set the pan on a cool marble surface if you have one (many classic fudge makers swear by marble for its even temperature).
- Don’t stir. Seriously, walk away. Put your spoon down. Go do something else for 30 minutes if you need to.
- Once you start stirring at the right temperature, go for a steady, strong motion. Don’t just dabble or swirl; you’re encouraging lots of small crystals, not letting the big ones gang up.
- Try not to scrape down the sides of the pan, especially if you see any crusty bits—they’re already crystallized and can mess up the batch.
Fixing and Repurposing Fudge Gone Wrong
Let’s face it—no matter how many tips you read, sometimes impatience (or a badly calibrated thermometer) gets the better of you. Your fudge’s texture is gritty beyond redemption. Now what? Before you throw it out, know that not all is lost. Grainy fudge can actually find a second life in other desserts. Break it up and use it as a rich topping for brownies, pancakes, or even churn it into homemade vanilla ice cream. Some bakers even use these gritty party-crashers as the base layer for rocky road slices, where the added crunch creates a surprise contrast.
If you’re still determined to rescue the batch as fudge, here’s a little trick: Return the fudge to a heavy-bottomed saucepan, add a splash of water or a few tablespoons of cream, and melt it down over low heat, stirring gently to dissolve the crystals. Once completely smooth again, repeat the cooling process—making absolutely sure not to stir until it’s right in the sweet zone. It doesn’t always work perfectly, but it can give you a second chance at creamy glory.
Some fudge lovers also toss gritty fudge bits into hot cookie dough, letting the heat melt the sugar in pockets throughout the cookie. The result is chewy, gooey cookies with caramel-style bursts—and who’s going to complain about that?
| Fix | How To Do It |
|---|---|
| Re-melt with water/cream | Add 2-3 tbsp. liquid, heat gently, cool and beat again |
| Use as topping | Sprinkle over pancakes, ice cream, or brownies |
| Bake into cookies | Add chunks to cookie dough before baking |
Of course, nothing beats getting it right the first time. But knowing how to pivot and save a treat from the bin is part of kitchen wizardry.
Mastering Fudge: Pro Tips and Common Mistakes
If there’s one truth about fudge, it’s that every batch teaches you something. Some of the best fudge I’ve tasted came from cooks who learned by doing—and a few failures along the way. To help you shortcut straight to smooth, here’s a mix of expert advice from award-winning Aussie fudge makers, and some wisdom I’ve picked up on busy weekends in my home kitchen:
- Never skip the thermometer. “Soft-ball” stage is science, not a suggestion.
- Don’t get distracted at the stove. Even one minute over temp can mean tough fudge.
- Use a wet pastry brush to wash down the sides of the pan as you boil, keeping stray sugar crystals from starting trouble.
- Watch your ingredients—condensed milk cooks much faster than heavy cream, and high-cocoa chocolate can make the mixture much thicker, needing a closer eye during cooling.
- Humidity affects everything. If you live in a super-humid spot (like the coast), try cooling your fudge in an air-conditioned room or at night. This helps avoid sticky or uneven batch outcomes.
- Don’t scrape that crust. If you see any crust on the side of the pan, ditch it rather than mix it in. It’s a “grainy fudge” timebomb.
- If you want a shortcut, try “cheater’s fudge” using marshmallows or condensed milk, but don’t expect the dense, creamy texture of traditional fudge.
- Once cooled, wrap fudge tightly and store at room temp—not the fridge, which can dry it out.
And here’s a wild tip from an old family friend: Place a cold metal spoon at the edge of the pan while cooling your fudge. If the spoon fogs up, the fudge is still too warm to stir. Simple, low-tech comfort for anyone cooking without gadgets.
There’s a kind of charm to the wait, though. Each batch of fudge is a blend of science and patience—plus a little whimsy if you ask me. Get the technique right, and you’ll change how people think about homemade fudge. Give it a go, stir at the perfect moment, and you’ll never look at a sticky thermometer with dread again. Next time your kitchen smells like sweet chocolate, and you’re hovering over the pan, remember: *Don’t* stir fudge too early, and you’ll get that legendary creamy texture every time.