Fudge Temperature Checker
The Sweet Trap of Ruined Fudge
There is nothing more frustrating than spending an hour stirring sugar and butter only to end up with a block of hard candy or a grainy mess. You followed the recipe, you used the right ingredients, but the texture is all wrong. This happens more often than you think, even to experienced bakers. The difference between perfect, creamy fudge and a kitchen disaster usually comes down to a few specific actions you take during the process. Understanding what fudge is helps explain why mistakes happen. It is a crystalline candy where sugar forms tiny crystals to create that smooth, melt-in-your-mouth feel. If those crystals get too big, you get grit. If they don't form right, you get hard candy. Let's look at the specific pitfalls to avoid so your next batch turns out flawless.
Ignoring the Temperature
Temperature is the single most critical factor in candy making. Many recipes tell you to cook the mixture until it reaches the soft ball stage. This is not just a suggestion; it is a scientific requirement. The soft ball stage happens between 112°C and 116°C (235°F to 240°F). If you pull the pan off the heat too early, the fudge will not set properly and will remain gooey. If you cook it too long, the sugar concentration becomes too high, and the fudge becomes hard and brittle.
You might think you can guess when it is ready by looking at the bubbles, but visual cues are unreliable. A candy thermometer is a specialized kitchen tool used to measure the temperature of sugar syrups is essential. Without it, you are flying blind. Even a few degrees off can ruin the batch. Place the thermometer in the center of the pan and make sure it does not touch the bottom, or you will get a false reading from the heat of the pan rather than the liquid. Patience is key here. Do not rush the heating process. Rapid boiling can cause the sugar to caramelize prematurely, changing the flavor and color.
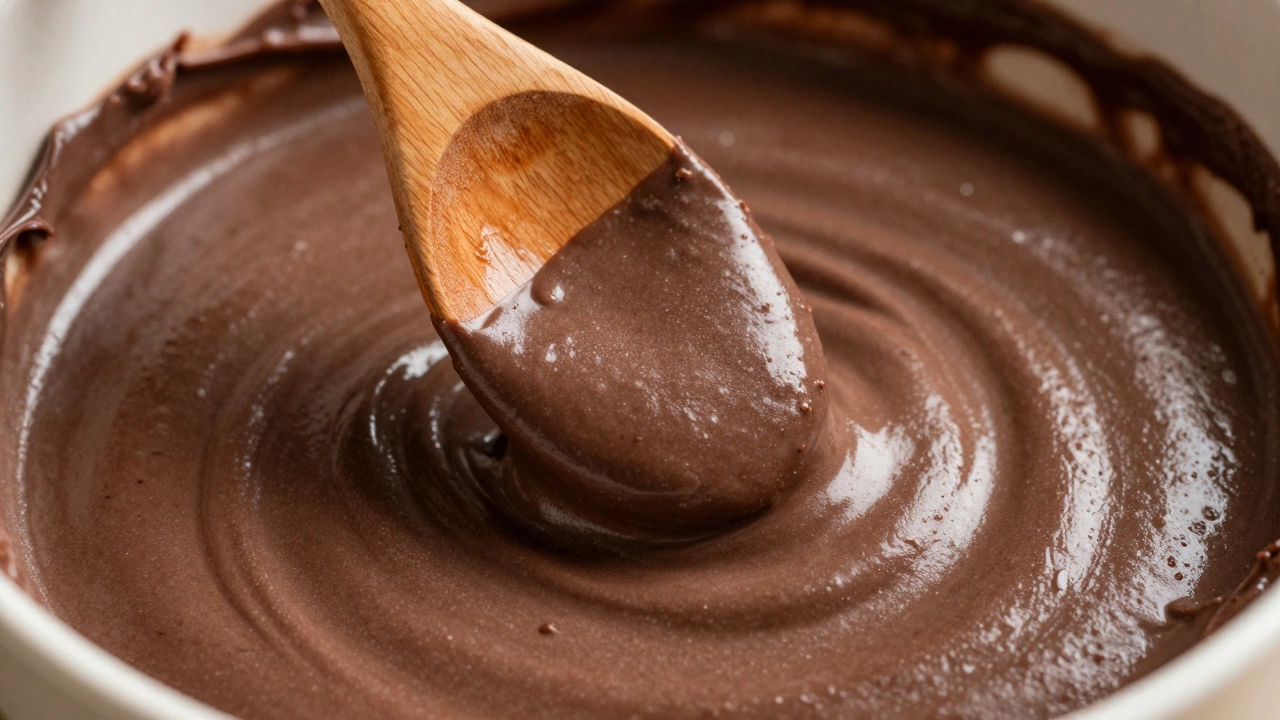
Stirring at the Wrong Time
Stirring is necessary, but timing is everything. During the initial cooking phase, you should not stir the mixture constantly. Constant stirring can cause sugar crystals to form on the sides of the pan too early. This is called seeding, and it leads to grainy fudge. Instead, wash down the sides of the pan with a wet brush to dissolve any stray crystals. Once the mixture reaches the correct temperature, remove it from the heat. This is when you start stirring.
However, there is a trap here too. You must stop stirring once the mixture starts to thicken and lose its gloss. If you keep beating the fudge after it begins to set, you incorporate too many air bubbles and force the crystals to grow too large. The texture becomes crumbly instead of smooth. Watch the color change from shiny to matte. That is your signal to pour the fudge into the prepared pan immediately. Overworking the mixture is one of the most common reasons why homemade fudge fails to achieve that classic creamy density.
Skipping the Acid or Corn Syrup
Many recipes include an ingredient like corn syrup, lemon juice, or cream of tartar. These might seem like minor additions, but they play a vital role in controlling crystallization. Sugar wants to crystallize naturally, but we want those crystals to be microscopic. Acid and corn syrup interfere with the sugar molecules, preventing them from clumping together into large, gritty chunks. If you decide to make a sugar-free version or skip the corn syrup to save calories, you risk ending up with a sandy texture.
Using corn syrup is a sweetener derived from corn starch that prevents sugar crystallization ensures a smooth consistency. It also helps keep the fudge moist. If you substitute it with honey, be aware that honey has a distinct flavor that might overpower the vanilla or chocolate. Stick to the recipe's guidance on invert sugars or acids. They are not just fillers; they are the stabilizers that keep your fudge from turning into a rock.
Using the Wrong Pan
The equipment you use matters just as much as the ingredients. Using a thin, aluminum saucepan can lead to hot spots. These hot spots burn the sugar at the bottom while the top is still undercooked. A heavy-bottomed saucepan distributes heat evenly, allowing the mixture to boil gently without scorching. Non-stick pans are convenient, but they can sometimes react with the high heat required for candy making. Stainless steel with a thick base is often the safest bet for serious candy makers.
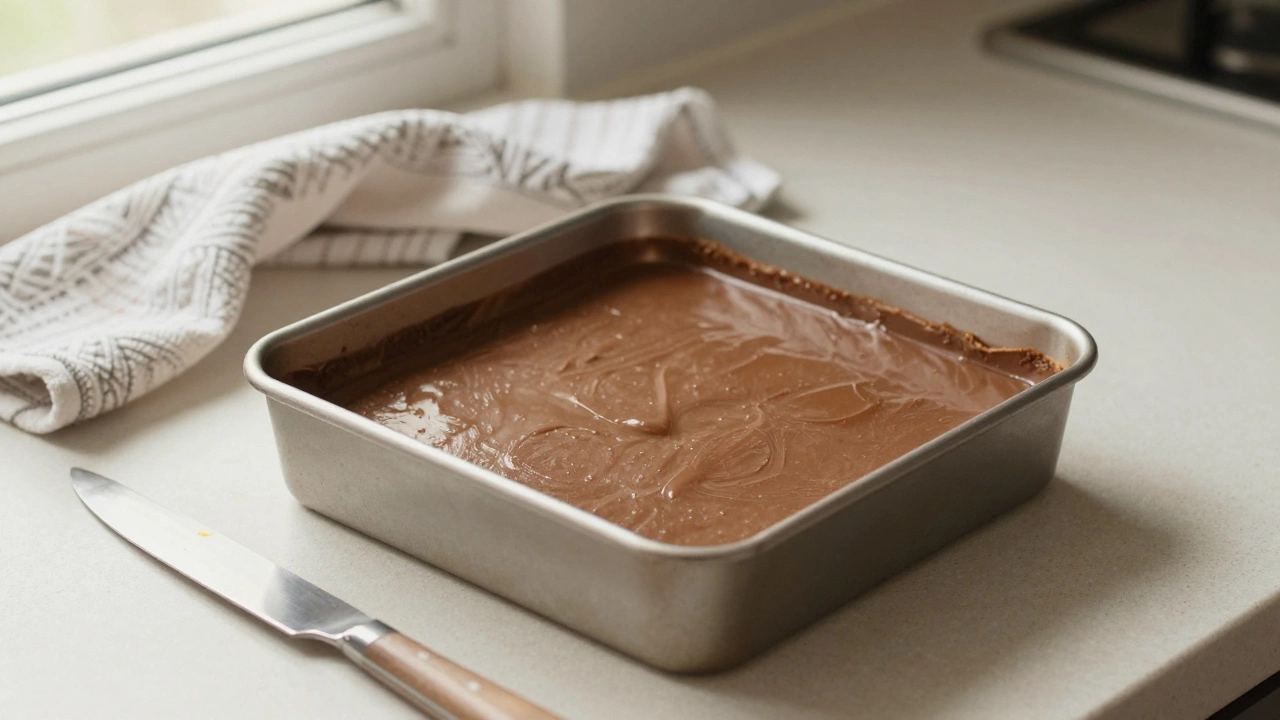
When it comes to setting the fudge, the size of your pan determines the thickness. If you use a pan that is too large, the fudge will be paper thin and hard to cut. If it is too small, the fudge will be too thick and take forever to set properly. A standard 8-inch square pan is usually the standard for most recipes. Grease the pan lightly, but do not overdo it. Excess butter can cause the fudge to slide around and separate from the sides, making it difficult to cut into neat squares.
Impatience with Cooling
Once the fudge is poured into the pan, the hardest part begins: waiting. You might be tempted to cut it while it is still warm to see how it turned out. This is a mistake. Cutting warm fudge results in messy edges and uneven pieces. The sugar structure needs time to stabilize completely. Let the fudge cool at room temperature for at least two to three hours. Do not put it in the fridge to speed up the process. Cold air can cause condensation to form on the surface, which makes the fudge sticky and ruins the texture.
Humidity is another enemy during this stage. If you live in a humid climate, moisture in the air can dissolve the sugar on the surface of the fudge. This is known as weeping. Keep the fudge covered loosely with a clean cloth or wax paper while it cools. This protects it from dust and excess moisture without trapping steam. Once it is fully set, you can store it, but the initial cooling period is non-negotiable for a clean cut.
Storage Mistakes
After your fudge is set and cut, how you store it determines how long it stays good. Fudge contains a lot of sugar, which is a natural preservative, but it is still perishable. Store it in an airtight container at room temperature. Do not refrigerate it unless the recipe contains fresh cream or dairy that spoils quickly. Cold temperatures can make the fudge hard and change the flavor of the chocolate.
Layer the pieces with wax paper to prevent them from sticking together. If you stack them directly on top of each other, they might fuse into a solid block. Proper storage can keep fudge fresh for up to two weeks. If you need to store it longer, you can freeze it. Wrap individual pieces tightly in plastic wrap before placing them in a freezer bag. Thaw them in the fridge overnight before serving to avoid condensation on the surface.
Comparison of Common Fudge Mistakes
| Mistake | Result | Solution |
|---|---|---|
| Cooking too long | Hard, brittle candy | Use a candy thermometer |
| Cooking too short | Runny, gooey texture | Reach soft ball stage |
| Stirring while boiling | Grainy, crystallized texture | Wash down sides, stir only after heat |
| Skipping corn syrup | Sandy mouthfeel | Include acid or syrup |
| Refrigerating to cool | Condensation, sticky surface | Cool at room temperature |
Understanding Chocolate Variations
When making chocolate fudge is a variation of fudge that uses cocoa powder or melted chocolate, the rules change slightly. Melted chocolate can seize if it touches water. If you are adding chocolate to the mixture, ensure it is fully melted and smooth before incorporating it. Cocoa powder needs to be sifted to avoid lumps. If you use high-quality chocolate, you might not need as much sugar, but the temperature requirements remain the same. The cocoa adds fat, which can alter how the mixture sets. Always taste the mixture before it sets if you are experimenting with chocolate brands.
Flavor Additions
Adding nuts, dried fruit, or extracts is fun, but timing matters. If you add nuts too early, they might sink to the bottom or burn. Stir them in after the fudge has cooled slightly but before it sets. Vanilla extract should be added at the end. If you add it while the mixture is boiling, the alcohol evaporates, and you lose the flavor. Wait until the pan is off the heat to add liquid flavorings. This preserves the volatile oils that give the fudge its aroma.
Why is my fudge grainy?
Grainy fudge usually happens when sugar crystals grow too large. This is caused by stirring during the boiling phase, cooking at too low a temperature, or skipping ingredients like corn syrup that inhibit crystallization.
Can I fix fudge that didn't set?
Yes, you can often save undercooked fudge by returning it to the pan and cooking it to the correct soft ball stage. Stir gently and check the temperature again before cooling.
Do I need a candy thermometer?
A candy thermometer is highly recommended. Visual cues are unreliable, and temperature accuracy is critical for achieving the right texture. Without it, you are guessing.
Why did my fudge turn out hard?
Hard fudge means you cooked it too long. The temperature went above the soft ball stage, creating a hard crack stage instead. Next time, remove it from heat at 112°C to 116°C.
How long does fudge last?
Stored in an airtight container at room temperature, fudge lasts about two weeks. You can freeze it for up to three months if wrapped tightly.